Need an efficient way to back up SQL to Google Cloud Storage? With SQL Backup Master, you can quickly configure, automate, and maintain secure offsite backups for your SQL Server databases. Follow the steps below to set up Google Cloud Storage (GCS) as your backup destination.
STEP 1 – GOOGLE CLOUD STORAGE ACCOUNT SETUP
Start by navigating to the Google Cloud Storage homepage and selecting either Get started for free or Try Storage free. You’ll be asked to provide company credentials and a phone number as part of Google’s verification process.
STEP 2 – CONNECT SQL SERVER DATABASE
In the Backup and Restore window of SQL Backup Master, click New Backup. The Database Backup Editor window will appear. Select Choose SQL Server to open the Connect to SQL Server dialog.
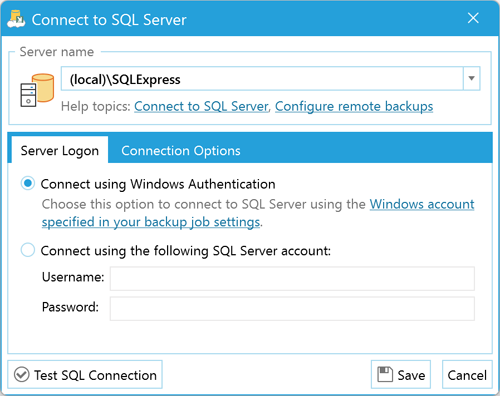
In the Server name field, enter or select the name of your SQL Server instance. Common examples include:
- (local)\SQLExpress – The default SQL Express named instance on the local computer.
- (local) – A local SQL Server installation without an instance name.
- Server1\SQLExpress – The default SQL Express named instance on a remote computer named “Server1.”
- Server1 – An unnamed SQL Server instance on a remote computer named “Server1.”
Click the Test SQL Connection button to confirm connectivity; then select OK.
STEP 3 – SELECT DESIRED DATABASES TO BACK UP
After connecting, the Database Backup Editor window will list your available databases under Source. Check the databases you want to back up as part of this job.
TIP: Enable Back up all non-system databases to automatically include any newly created databases on the target SQL Server in subsequent backups.
STEP 4 – ADDING A BACKUP DESTINATION
Under the Destinations header, click the Add icon. A window will appear, displaying compatible backup destinations supported by SQL Backup Master:
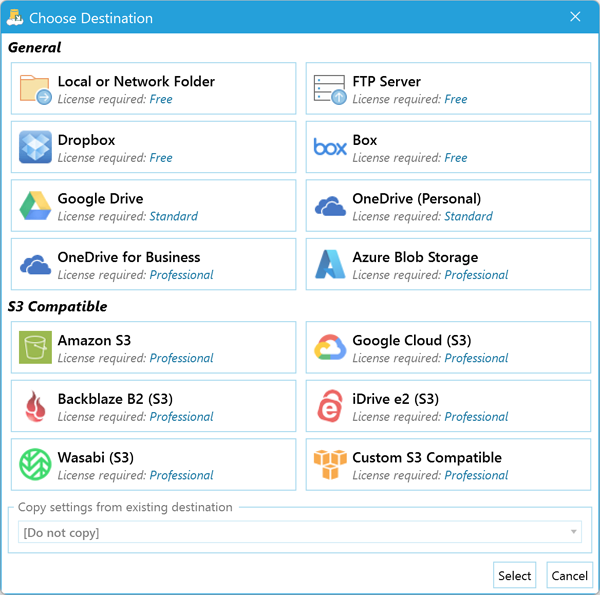
Double-click Google Cloud Storage to select it as your backup destination. The Google Cloud Storage Destination Settings window will appear, prompting you to enter your Access key, Secret key, and Bucket. You can generate these keys from your Google Cloud project credentials.
Click the Test button to verify that SQL Backup Master can connect to your GCS bucket. Select OK, then confirm once more on the main window to continue. Finally, click the Save icon at the bottom-right of the Database Backup Editor to finalize your backup destination.
STEP 5 – RUN THE BACKUP
Return to the main SQL Backup Master window, locate your new backup job, and click Back up now to begin sending your SQL Server databases to Google Cloud Storage. If the backup job fails, consult the log file for more detailed information on any errors.
That’s it! You can now safeguard your SQL Server data offsite by leveraging the reliability of Google Cloud Storage—powered by SQL Backup Master from Key Metric Software.